


































































Hiking 101: Descents Are Harder – How to Handle Them Safely
In recent years, I've been looking forward to the uphill climb much more, and going downhill feels like the hardest part of the hike. Do you feel the same?
When I was younger, I felt that climbing was more difficult for me – I would get out of breath, my heart rate would reach 140–160, I'd sweat, and I had to take breaks or go slower. I thought I would "just" run down from the peak, that it wouldn't be a big strain, more of a relaxing stroll. I mostly walked in stiff ankle boots.Not every descent was a trouble-free run and an easy walk downhill.
Once, I took a nasty fall while descending from a high-altitude mountain hut, bruising my palm when I slipped on gravel, getting bruised knuckles and black toenails. Another time, I had to stop about ten times while running down from the peak because my knees and quads hurt like hell.
Moving Downhill
During the ascent, your lungs and heart work at full capacity, and your muscles shorten (concentric muscle contraction).During the descent, on the other hand, the muscles lengthen (eccentric muscle contraction); you have to brake with every step, and the muscles actively control the impact and slow down the movement of your entire body weight and the backpack on your back.
For the muscles, this movement is much more demanding, the muscle fibres are loaded many times more, and the result can be severe pain and significant muscle stiffness the next day.
When walking downhill, you put pressure of 3 to 4 times your body weight on your knees and ankles combined with the weight of your backpack. Don't forget to breathe deeply into your diaphragm during the descent, which stabilises your core and creates a "cushion" that protects your lower back from shocks.


How can you train your muscles for downhill movement? Slow squats with feet and knees pointing outwards or medium-length lunges with a slow descent are excellent.
If you are a complete beginner, I recommend doing exercises aimed at strengthening the quadriceps and glutes in front of a mirror; you can ask an experienced friend or hire a trainer who will show and explain everything to you.
If you don't want to pay for anything and live in a block of flats, you can train on the stairs. Take the lift up and walk down the stairs slowly, stepping quietly and placing your foot on the step in a controlled manner. Don't forget to wear soft trail/running shoes.


Soft Knee and Poles
I understand that leaning forward slightly when walking down a steep hill, especially when carrying a heavy backpack, seems counterintuitive to some.The key is to maintain the principle of the body's centre of gravity with the backpack. This helps reduce knee and back pain. It is precisely with a slight forward lean downhill that the centre of gravity shifts over the knees.
Straight legs and landing on the heel are real shock therapy. When stepping on the forefoot, your Achilles tendon and calf muscle are activated, functioning like a spring. A soft knee and landing on the forefoot can be trained very well by slowly walking down stairs.

 nely

 P.R.
If you don't use poles during the entire hike, take them at least for the descent. Extend them by 5–10 cm compared to their normal length. The length should be such that your elbow forms a right angle when the pole is placed on the slope in front of you. The extension depends on the steepness of the descent.
Let the pole land first, then your foot. If the pole lands first, it transfers part of the body weight and the impact from the feet, knees, and lower back to your arms.
For example, when descending from a steep peak, definitely use poles. Although the trail from the peak traverses down to the ski lift, from the top of the lift it goes straight down to the hut. So traverse whenever you can.
Don't forget to look a few metres ahead of you, not just at your feet. The brain can process the terrain in advance and prepare the foot for impact.
Shoes and Lacing
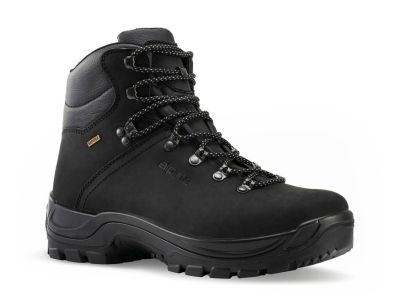
Do you re-lace your shoes during a hike when going uphill and downhill?When descending, I usually tie my laces tighter, which helps stabilise the foot and keep the heel back. With an unstable foot, the lower leg muscles have to work harder.
If you tighten the laces, your foot won't slide on the insole, you won't rub your toes against the toe box and upper, and your toes won't hit the front of the shoe. If you have major issues with blisters and chafing, try natural sheep's or alpaca wool – wrap a small piece of the skein between your toes in the problem areas.
Don't forget to put on dry socks.


Do you use a heel lock or cross-lacing? I've had good results with a double bow knot. It holds firmly even on round laces. With soft and flexible shoes, lace them tighter than with stiffer ones that have a harder sole. It's basic physics, shear force, and shoe rigidity.
Personally, in recent years, I have preferred walking in soft, moderately cushioned shoes. They absorb impacts very well, and my knees and ankles don't suffer as much as they did when I used to wear heavy hiking boots. High cushioning (a thick sole) absorbs more impact, but the foot has less contact with the terrain surface and therefore has to work harder.


Proprioception and Foot Resilience
The sense of position and reactivity of the neuromuscular system (proprioception) is one of the fundamental skills when walking downhill. It can be trained over the long term. Your brain can learn to react in a split second to the position of your foot, thereby preventing injuries.A good exercise for proprioception is standing on one leg with eyes open or closed (5 minutes a day).
A higher level of difficulty is standing on one leg and tracing the alphabet with the ankle of the other foot, constantly forcing the body to react to the shifting centre of gravity.
Other exercises include picking up a towel with your toes under your desk, or massaging your foot with a tennis ball or a spiky massage ball. This is also great prevention against Alzheimer's and age-related memory loss, while building neuroplasticity.


You can train foot resilience by walking on grass, sand, small pebbles, or a spiky massage mat. I still remember my mum using one for her back 25 years ago. You can easily create a perfect training spot at home to increase foot resilience.
Pour small pebbles into a shoebox and, for example, stand and step on the stones for a few minutes every day while brushing your teeth. As a bonus for recovery and stimulating the nerve endings in your foot, you can treat yourself to a Kneipp bath at home.
By exercising your quads and glutes, practising proper descent techniques and pole use, conditioning your feet, and training proprioception, you can achieve a stable foot and strong muscles ready for descending any hill.
Photo source: editorial archive
Similar articles

In the mountains, even a minor injury can become much more serious—help may not arrive quickly. That’s why we must first be able to help ourselves.
Why should you start road cycling, and what’s important when you’re just starting out? You might find the answer in this article.
I got rid of my knee and back pain, I feel less fatigued when running, and muscle soreness is now manageable.
Product selection
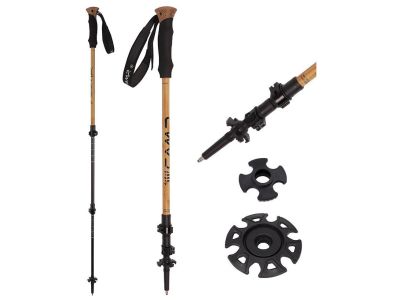


-8% LEKI Skytera Lite women's poles, 100 - 135 cm, black-white-neonorange
109 €
-8%
RRP 119 €

 arrow_outward
