



























































Bikepacking 101: Bike Customisation
Not 100 % satisfied with your new bike? It’s time to fine-tune it to your liking!
It’s not uncommon to own a brand-new bike and still feel that something isn’t quite right. Unless you plan to build your bike from scratch, you’ll inevitably have to make a few compromises. And the longer the ride, the more noticeable those compromises become.By now, you might be thinking: “So, I’ve spent hundreds, even thousands, of euros on a new bike, and the MTBIKER editors are still trying to get me to spend more!” 🙂 But it’s perfectly normal to replace or fine-tune certain components, even on a brand-new bike.
Today, we’ll take a look at the most common areas where a few adjustments can make all the difference.
Saddle: The Foundation of Comfort
Bikepacking is a long-distance discipline. You might spend more than nine hours a day in the saddle, which means comfort should be the top priority. Choosing the right bike geometry and frame size is one aspect, which we covered in our previous article. Now, let’s focus on the two most important contact points: your hands and your rear.

First, let’s talk about the saddle. The best place to start is by measuring the width of your sit bones, but it’s important to remember that not all saddles are created equal.
While a 140 mm saddle from one brand might fit perfectly, a 140 mm saddle from another brand could be agonisingly uncomfortable. The saddle’s shape plays a huge role. If you’ve had a positive experience with a particular model, don’t hesitate to install the same saddle on your new bike.
For me, the biggest marginal gain in this area comes from a saddle cutout. It can quickly reduce pressure on sensitive areas, and when combined with quality cycling shorts, it’s a game-changer for long rides.


Handlebars, Extensions, and Bar Tape
The second contact point is the handlebars. After several very long rides, I can confidently say that from my perspective, aero handlebars are the best choice.This doesn’t necessarily mean you need to spend €500 on an integrated cockpit, although that is one option. 🙂 To start with, traditional handlebars with a flattened top section will do the job. They reduce pressure on your hands, or, more precisely, distribute it more evenly, compared to handlebars with a completely round profile.
Option number two is "grips" that I only recently came across. This is the Redshift Cruise Control Drop model, which mimics the flattened shape of aero handlebars. I must admit, however, that I haven't yet tested them myself.
Round-diameter handlebars are practical from another perspective: the installation of extensions. Some people love them, others consider them completely unnecessary. I would only label them unnecessary if they aren't properly "fitted". Or, if you don't plan rides longer than 200 km.
Don't worry, I'm not going to send you for a bike fit just for extensions. 🙂 The main point, however, is that on long rides, the goal isn't to have an aggressive position and be as aerodynamically efficient as possible. In this discipline, I've always viewed extensions simply as a way to rest my hands.
Therefore, don't be afraid of a higher angle – your hands don't necessarily have to be parallel to the road, but at a certain angle so you can lean on the extensions while pedalling. It's all a matter of gradual fine-tuning and getting used to it.
I recommend testing any changes on a shorter route first, and then heading out for a full-day/multi-day ride with a finalised setup.


And now, regarding the selection of a specific model. Considering what's been said above, the conclusion is clear – extensions don't have to be the most expensive, but it's useful if they can be adjusted in various directions.
For example, I personally chose the BBB BHB-60 AEROMAX model. The tilt relative to the handlebars, the left-right tilt of the extensions, the fore-aft position of the extensions, and also the position and tilt of the armrests can all be adjusted independently.
The last piece of the puzzle is bar tape. Here, it's important to emphasise that damping properties are absolutely fundamental. Therefore, you should definitely look for thicker bar tapes (approx. 3 mm), and gel tapes can also be beneficial.
Tires: Fast, Comfortable, or Puncture-Proof?
Tires are a slightly more complex question. I choose primarily based on where I'll be riding.For me, bikepacking is usually road-dominated, so I opted for the Panaracer Gravelking SS model in a 35C width. As a road rider, I find this size perfectly sufficient, as I mostly encounter rough or lightly gravelled roads.
However, if bikepacking in hills and mountains appeals to you more, don't hesitate to choose tires with a more aggressive tread, greater width (depending on frame clearance), even at the cost of higher weight.


As I mentioned in the introduction to the previous article, bikepacking is primarily about enjoyment and less about speed. That's why, when choosing, I set aside parameters like high TPI or low rolling resistance. It's more important to pay attention to grip, as you'll likely be riding in various conditions.
An increased puncture protection is also a very welcome bonus. This will then pay off during your ride in the form of fewer technical issues.
Some component changes only come with time, as you clock up more and more kilometres. Here, we're talking about minor details such as cassette range, chainring size, disc model, or pad material.
That wraps up the chapter on the bike, and next time we'll move on to gear.


-27% Shimano Deore SL-M5100 gear shift, 11-sp., right, I-Spec EV, OEM
16 €
-27%
RRP 39.99 €

Shimano Altus FD-M370 3x9 derailleur, top swing, dual pull, clamp-on
17.99 €
RRP 20.99 €

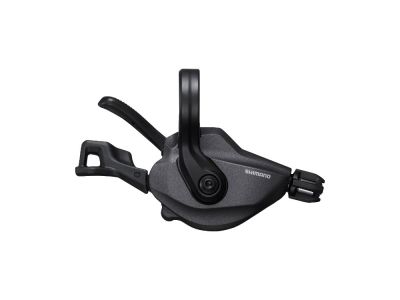
savings Shimano Deore XT SL-M8100 shifting, 12-sp., right, clamp, OEM
35 €
savings
RRP 65.99 €

 arrow_outward
