
































































Steps to Take After Getting a New Mountain Bike
Purchasing a new bike is the beginning of many great rides—but only if the bike is set up correctly. So, what should you do after buying a new bike?
When you buy a bicycle in person at a store, trained staff will usually adjust the components to suit your needs. But what if you order a bike online, buy one as a gift, or simply want to learn more about bike setup?In this article, we’ll explain the basic adjustments you should make to ensure your bike performs properly.
Tire Pressure
Tire pressure is one of the most important adjustments on a bicycle. Even if everything else functions perfectly, incorrect tire pressure can significantly affect your bike’s performance on mountain trails.Most new bikes come with inner tubes installed. The exception is some models that are equipped with a tubeless system directly from the factory.
Tire pressure is important for three main reasons:
- Traction – efficient transfer of power to the ground during acceleration
- Comfort – absorption of small bumps and trail vibrations
- Grip – how well the tire maintains contact with the terrain, especially in corners
Tire pressure is measured in bars and PSI. PSI offers finer increments and is therefore commonly used for air shocks and forks. For reference, 1 bar equals 14.5038 PSI.


What if the tire pressure is too high?
Simply put, the tire will feel very hard and bounce over bumps. Think of an inflated ball bouncing off the ground. At high pressure, the tire cannot deform sufficiently to adapt to uneven terrain.As a result, grip is reduced. Excessive pressure can also be dangerous, which is why tire and rim manufacturers specify maximum pressure limits that should never be exceeded.
What if the tire pressure is too low?
If the tire is too soft, it will deform excessively, especially during aggressive riding. While it may feel grippy on smooth terrain, higher speeds and technical sections can cause unstable handling and may even allow the tire to come off the rim.In the worst case, this could result in a crash and injury; in the best case, you may damage your rim. Riding on an underinflated tire also increases the risk of punctures and pinch flats, such as when hitting a rock.


So, how should I inflate my tires?
There is no universal pressure chart. However, it is generally recommended to start with a slightly higher pressure (for example, 2 bar) and then adjust it gradually based on rider weight, tire width, riding style, and trail conditions.If the tire feels too “jumpy” and bounces off rough terrain, release a small amount of air. If the tire deforms excessively, feels unstable, or you strike the rim against roots or rocks, add more air.
To calculate a suitable starting pressure, I recommend using this calculator. While it may not provide the perfect setting, it offers a useful baseline. Typically, the front tire runs at slightly lower pressure than the rear tire because it plays a key role in steering and line choice.
SAG
If you have purchased a bike with air suspension—meaning an air fork and possibly a rear shock—you should properly adjust the air pressure in these components. Setting SAG correctly is essential.SAG is the amount the fork or shock compresses under the rider’s weight while fully equipped with the gear normally used for riding. Before you begin, dress as you would for a typical ride. You will need a pump designed specifically for suspension components.
⚠️ Never use a standard tire pump or compressor to inflate suspension components.
The procedure is simple:
- Locate the O-ring on the shock shaft or fork stanchion.
- Slide it as close as possible to the seal.
- Get on the bike in your normal riding position while wearing all your riding gear.
- The suspension will compress. The O-ring will indicate by how much.
- Carefully dismount without moving the O-ring, otherwise the measurement will need to be repeated.


💡 TIP: SAG is easiest to adjust gradually. On a full-suspension bike, adjust the rear shock first and then the fork, or vice versa.
What SAG value should you aim for? SAG is measured as a percentage. With RockShox components, this is easier because the fork stanchions and shock shafts include measurement markings. If no scale is present, measure the total travel and calculate the percentage of compression.
Manufacturer-Recommended Values
Manufacturers often provide recommended pressure values (in PSI) based on rider weight. These figures simplify the setup process, but it is still worth checking SAG after inflating the fork or shock to the suggested pressure. Such charts can usually be found on the fork leg or on the manufacturer’s website.Most Important: What SAG Percentage Is Ideal?
Too much SAG means the suspension will bottom out more easily. Too little SAG means you may not be using the suspension’s full potential.An ideal SAG value is generally between 20 % and 30 %, depending on riding style and bike type. Some riders prefer slightly less SAG in the fork than in the rear shock.


Handlebar Ergonomics
This section is easier to understand, but handlebar setup is just as important as tire pressure or suspension adjustment.We can divide it into three main areas:
- Lever placement
- Lever angle (especially brake levers)
- Handlebar height
Lever Placement – What Does It Mean?
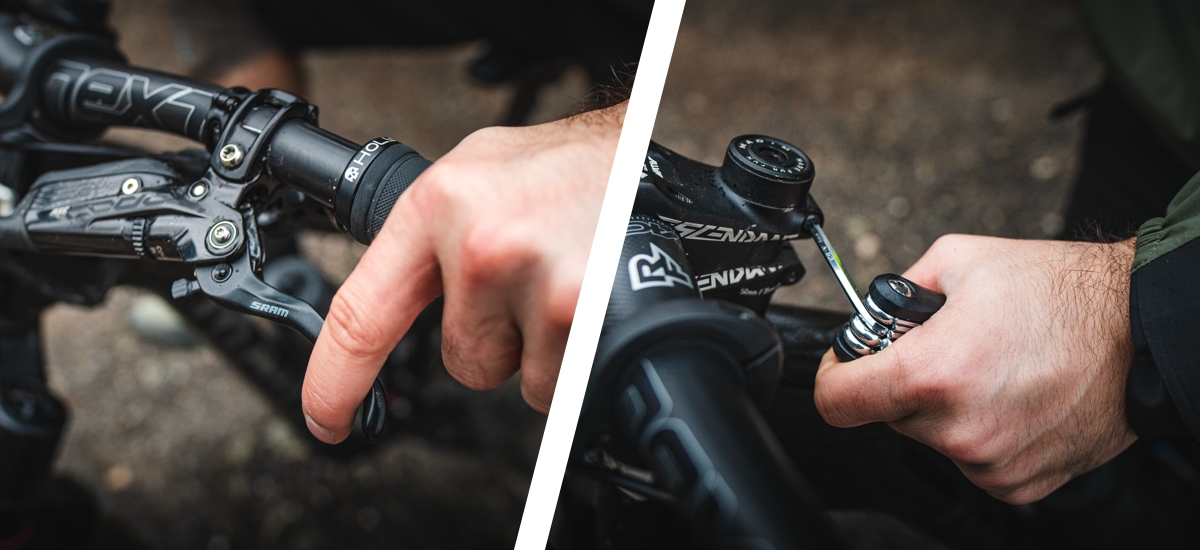
Your handlebars may include brake levers, shifters, a dropper-post lever, and suspension lockout controls. While riding, you should never struggle to reach any of them.I recommend adjusting everything so that every control can be operated naturally while your hands remain on the grips. It may take some experimentation, but the effort is worthwhile.


Lever Angle
The angle of your brake levers is particularly important. If they are positioned too high or too low, your wrists may become uncomfortable or painful.Ideally, your finger resting on the brake lever should form a straight line with your forearm, minimizing wrist strain.
Handlebar Height (Stack)
You can adjust handlebar height using spacers beneath the stem. Higher handlebars shift the rider’s position rearward, while lower handlebars place the rider farther forward over the front wheel.I recommend making small adjustments and allowing time to adapt to each change. Even moving a single spacer can noticeably affect bike handling. Lower handlebars generally create a more aggressive, performance-oriented position, while higher handlebars prioritize comfort.

Handlebar rotation is also related to overall cockpit setup. New bikes are not always adjusted perfectly from the factory. Most handlebars have alignment markings that make it easy to set the correct angle. I recommend staying close to these reference marks, as extreme handlebar angles can lead to discomfort and wrist pain.
Saddle Adjustment – Height, Fore-Aft Position, and Angle
Saddle Height Adjustment
One of the simplest ways to adjust saddle height is to sit on the bike and pedal using your heels. Your legs should be almost straight at the bottom of the pedal stroke, but your knees should not lock out completely. Your hips should also remain stable without rocking side to side.There are more precise methods available, but they are generally more complicated.
Fore-Aft Position Adjustment
To adjust saddle fore-aft position, use a plumb line. First, position the cranks horizontally with both feet on the pedals. Then hold the plumb line from your knee. The weight should align with the pedal axle. If it does not, move the saddle and repeat the measurement.

Saddle Angle Adjustment
To adjust saddle angle, use a spirit level or a smartphone app. The saddle should be approximately level. If the nose points downward, more weight is transferred to your hands, which can cause discomfort. If the nose points upward, pressure may build up in sensitive areas.Every rider is different, so it's important to adjust all components according to your personal preferences. What works for one rider may not work for another.
However, riding position is particularly important in performance-oriented mountain biking disciplines, which is why professional bike fitting is often recommended for the most precise setup.
A Properly Set Up Bike Is Essential
The difference between a well-set-up bike and a poorly adjusted one can determine whether cycling becomes a lifelong passion or just a few uncomfortable hours on the trail.A properly adjusted bicycle provides comfort, confidence, and enjoyment on every ride.
Photo source: editorial archive
Similar articles

Be honest - when was the last time you really adjusted your suspension? If you're like 90% of riders, the answer is: never.
 PR article
There are bike components that are affordable, easy to replace, and can still make a significant difference to your riding experience.

Exercise can improve your strength, increase riding comfort, and help prevent injuries.


 arrow_outward
